User and Programmer Guide
Introduction
This page contains the user and programmer guide for WStore, a reference implementation of the Store Generic Enabler.
User Guide
This user guide contains a description of the different tasks that can be performed in WStore using its web interface from different points of view, depending on the roles of the corresponding user.
Profile configuration
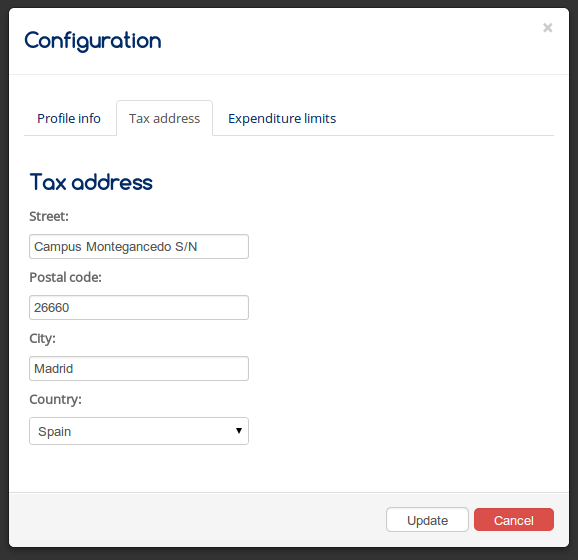
All users can configure their profile including some information such as a default tax address.
To configure the user profile, move your mouse to username on the top right of the page and choose settings.
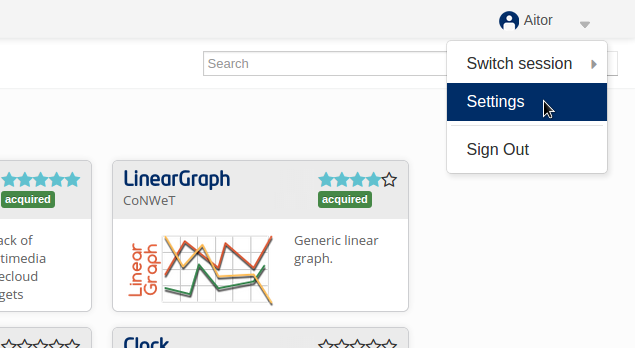
In the displayed modal, it is possible to view user profile info. To change this info or provide new one, select the Edit button.
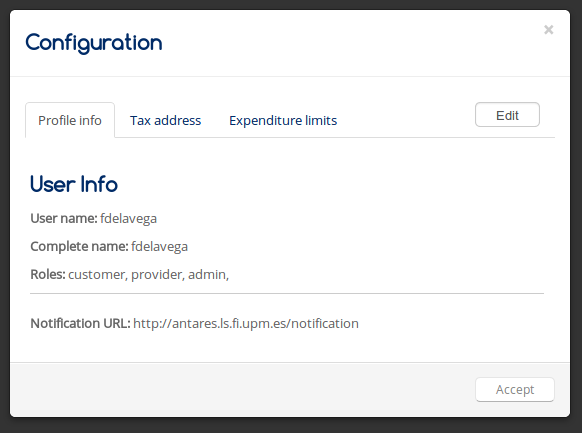
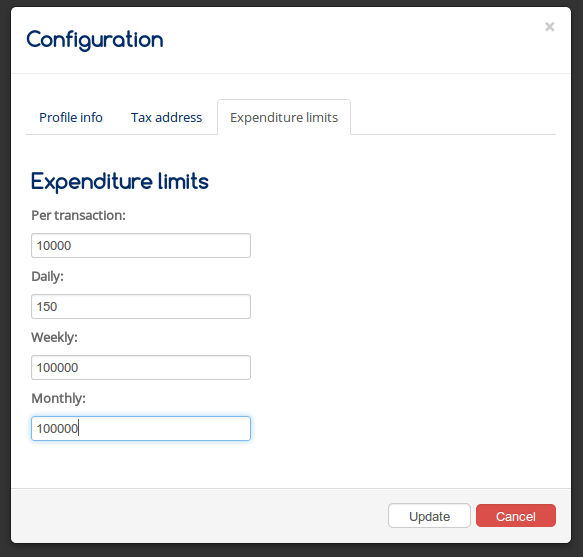
Fill the different fields through the Tabs and press Update.
Service provider
This section explains how a service provider can create and monetize her service offerings using WStore GUI.
Registering a resource
Resources are used in the offerings in order to allow to include downloadable digital assets, such as applications, widgets, etc.
To register a resource, select the My Offerings view.
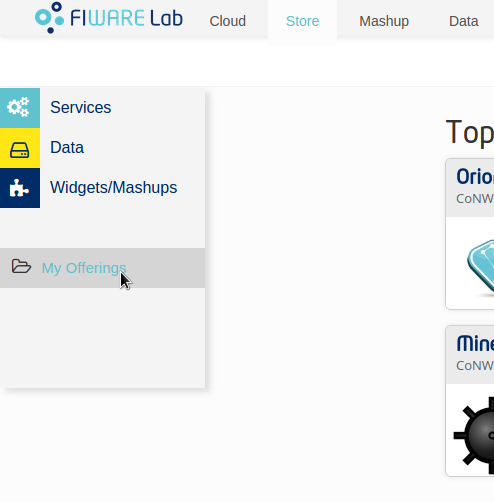
Select the options dropdown and choose Register resource

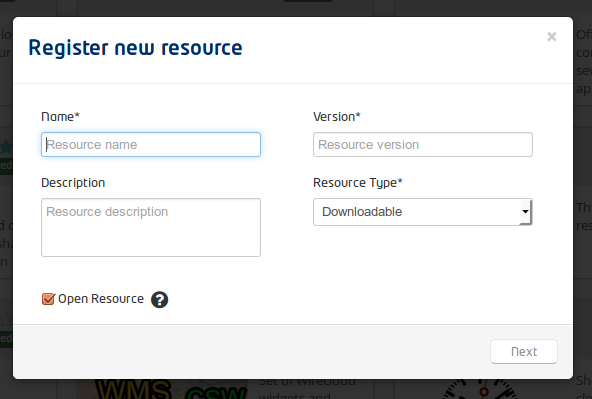
In the displayed modal, the first step is filling the resource name, the resource version and the resource description. Then, it is necessary to choose the resource type and to choose whether the resource is open or not. This flag is used to specify if the resource can contain an authorization mechanism that does not depend on WStore, for example an API resource that requires authenticated users.
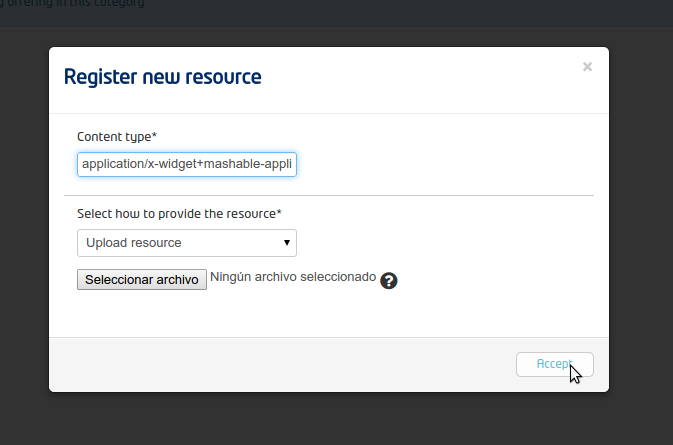
The next step consists on providing a mime type for the resource and uploading the resource or providing a link from where the resource can be accessed, depending on the selected type of resource.
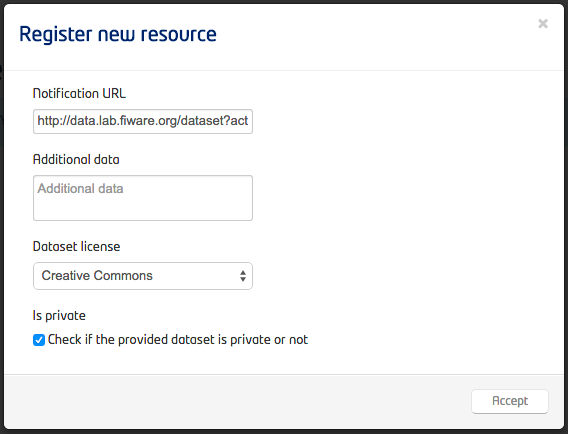
Finally, depending on the type of resource a final form may appear for retrieving meta information.
Note
The concrete types of resources available will depend of the concrete instance of WStore and the resource plugins installed on it. By default WStore has the Downloadable and API types.
Viewing resources
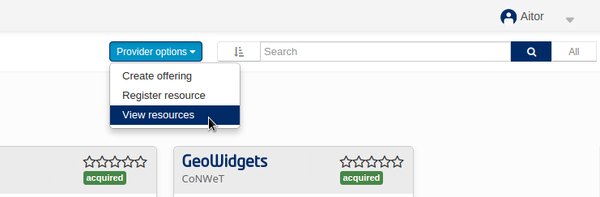
A service provider is able to view the resources which are already registered. To view the resources, select the catalogue view and choose View resources in the dropdown menu.
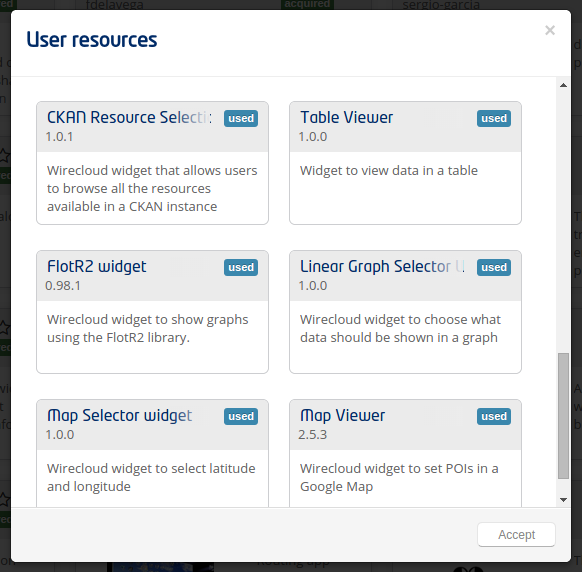
In the displayed modal, you can see the different resources you have registered.
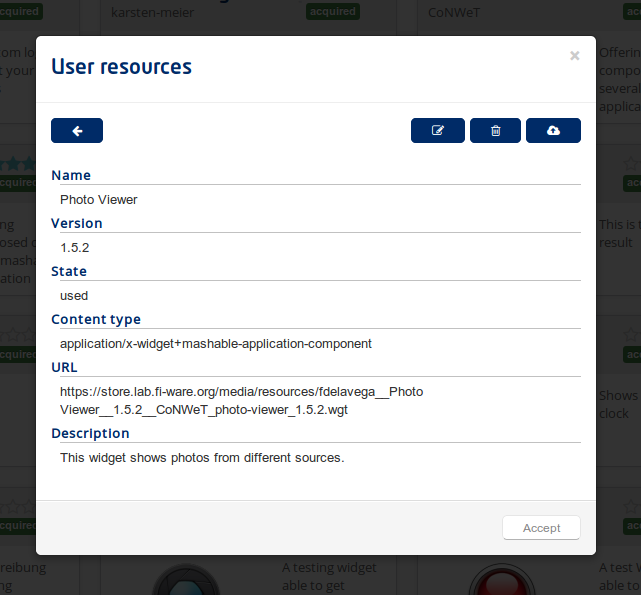
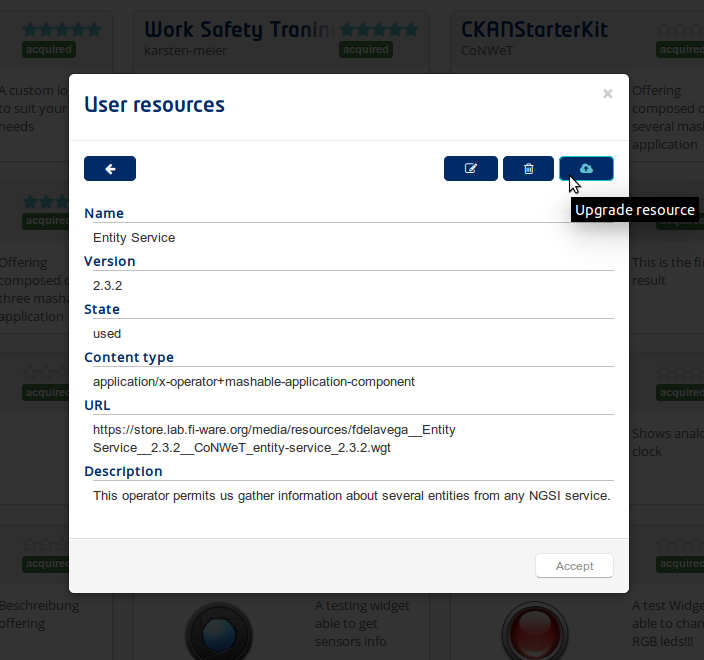
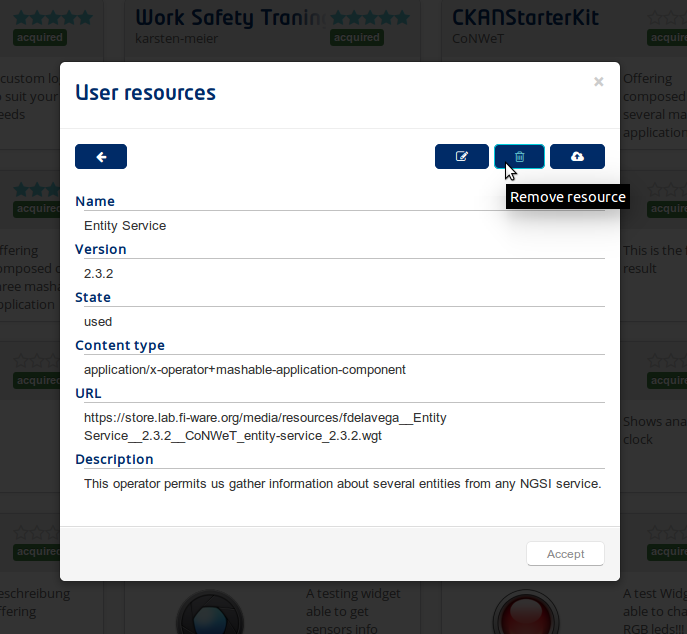
It is possible to view the details of a registered resource clicking on it.
Editing a resource
Depending on the state of the resource (created or used) a service provider can edit the information of a resource.
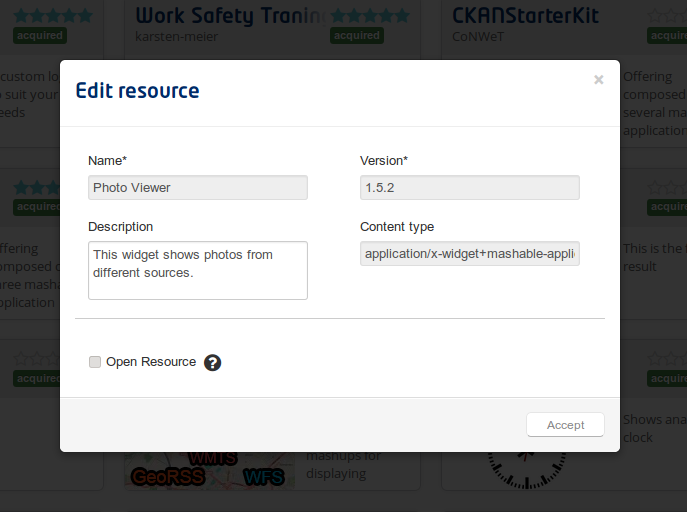
To edit a resource, click on the edit button inside the resource details view.
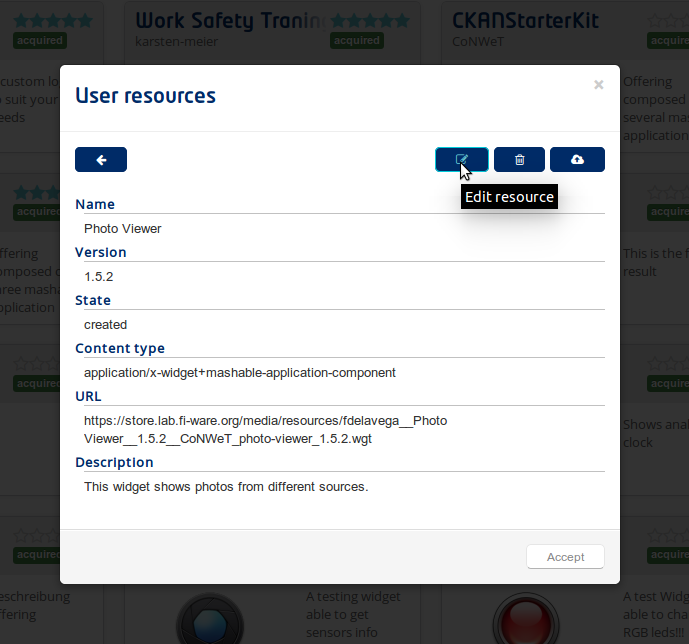
If the resource is in created state, that is, the resource has not been included in any offering, it is possible to modify the description, the content type and whether the resource is open or not.
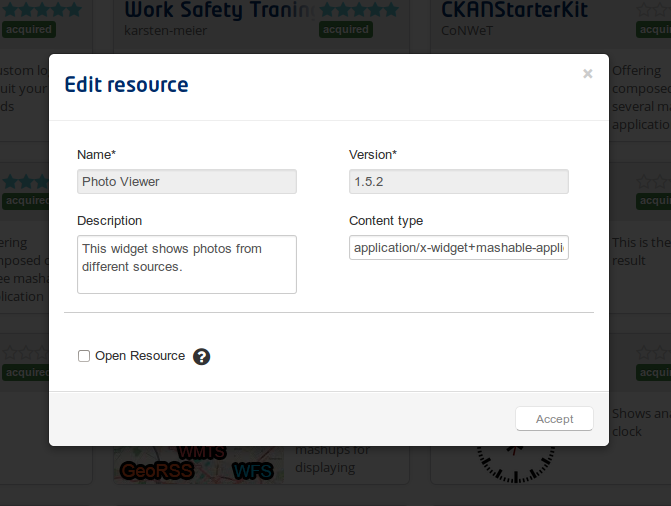
If the resource is in used state, only the description can be modified.
Upgrading a resource
It is possible to upgrade resources providing a new version of them. Note that when a new version of a resource is provided all the offerings that include this resource are automatically updated, so this is the mechanism that allows providers to perform automatic updates on their published apps, for example for including a patch.
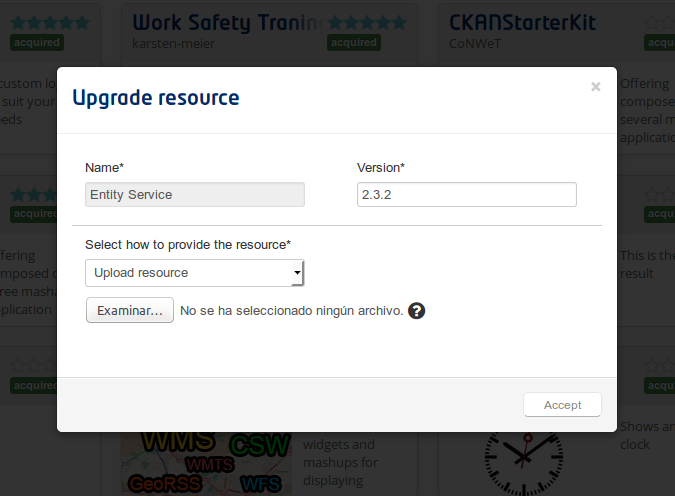
To upgade a resource, click on the upgrade button in the resource details view.
Then, it is necesary to provide the new version number and the new resource itself.
Deleting a resource
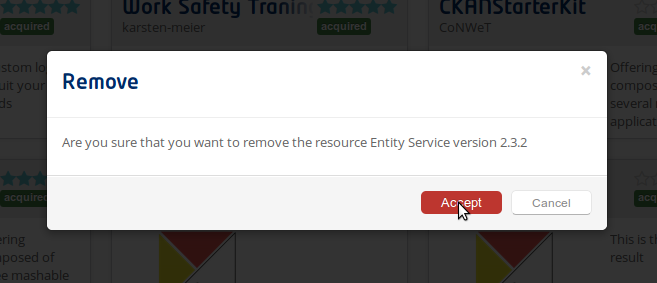
A provider can delete their resources, depending on the state of the resource this action has different behaviours. If the resource is in created state, so it is not being used in any existing offering, the resource is completely removed from WStore. On the other hand, if the resource is in used state, it is set as deleted and cannot be included in more offerings.
To remove a resource, click on the remove button in the resource details view.
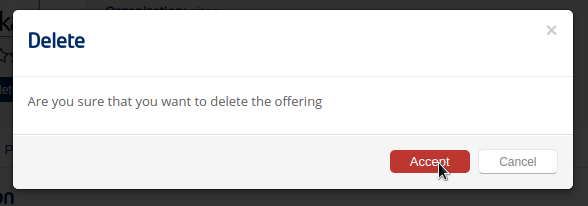
Then, press Accept when asked.
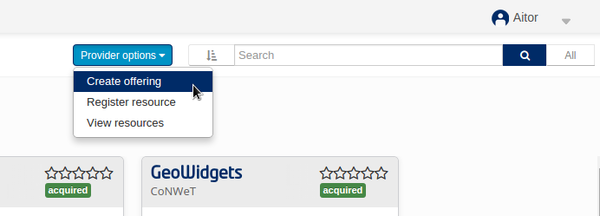
Creating an offering
Offerings are the main entity managed by WStore and include all the relevant information such as the pricing model, legal conditions, interactions, service level agreement, etc. To create an offering, go to My Offerings. and choose Create offering from the Provider Options dropdown.
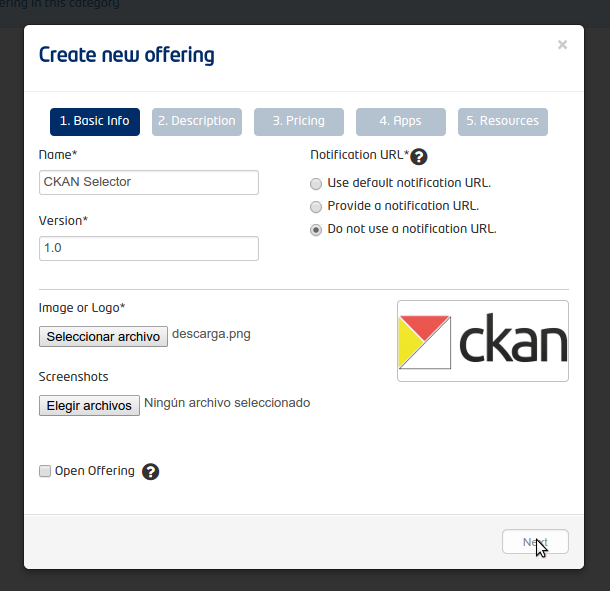
In the displayed modal, fill the name, version and description fields. Next, provide an image and an optional set of screenshots
The next step consits on selecting how to provide the notification URL. This field is used by WStore to notify the service provider when its offering has been purchased. There are three different options: (a) Provide a new notification URL for this offering. (b) Use the default notification URL of the provider that can be configured in the user profile configuration form. (c) Not using a notification URL for this offering.
Finally, choose whether the offering is open or not, that is, all the resources will be direcly accessible by WStore customers whitout the need of acquiring the offering. Note that if the offering is created as open, only open resources (resources that do not contain an external authetication mechanism that do not depend on WStore) can be bound to it.
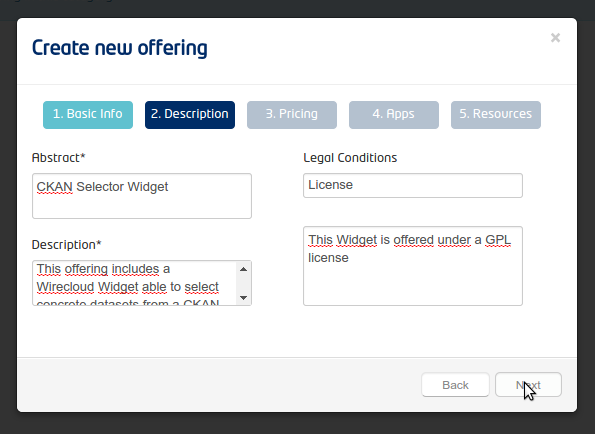
The next step consist on providing description information for the offering, including an abstract and a long description. Additionally, it is also possible to provide a legal description including the terms and conditions of the offering.
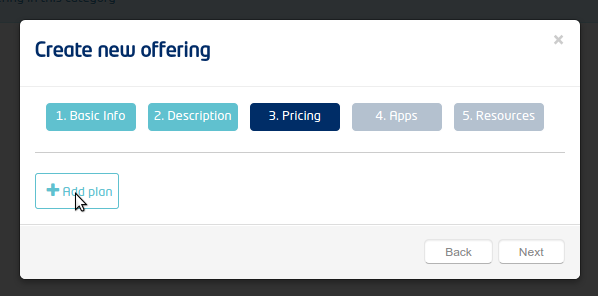
Once offering description has been provided, the next step is providing pricing information. The pricing models in WStore are based different price plans that can be chosen by the customers when acquiring the offering. To create a price plan click on Add Plan
Then, it is required to include a label that identifies the price plan, a display name, and a description. Additionally, it is needed to select the currency of the price plan.
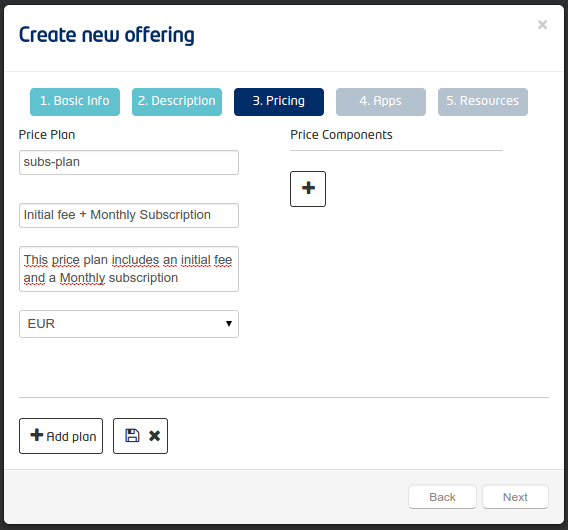
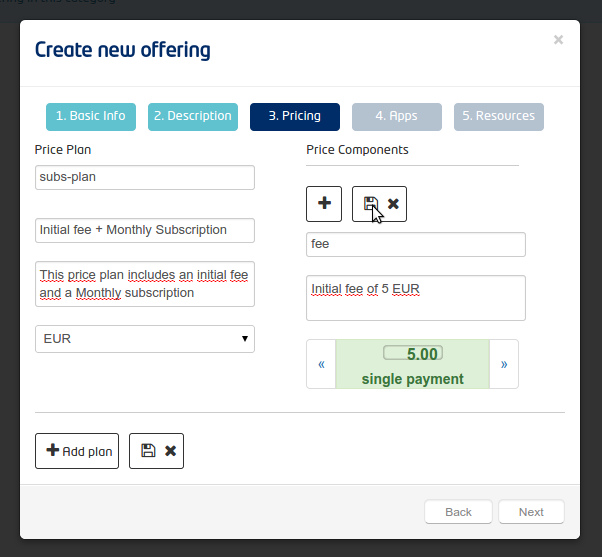
For including the pricing information, it is needed to create price components. To create a price component click on the add button in the price components section.
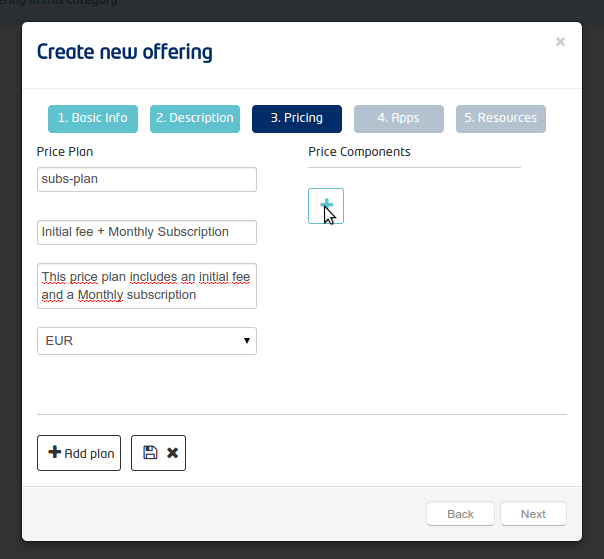
Next, provide a label for identifying the component and a description. Next, provide the value of the component chosing the unit from the ones available. Finally, save the price component clickin on the save button.
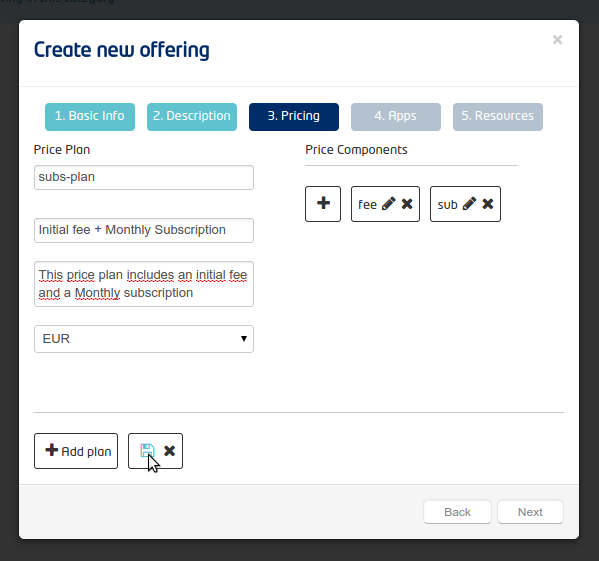
The last step for the creation of a price plan is saving it by clicking on the save button.
Note
For creating a free offering you can just skip this step.
Once the pricing info has been provided, the next step consist of including Applications. This applications need to be uderstood as OAuth2 Applications and are those registered in the Identity Manger by the provider. Including Applications in an offering allows to grant real access to the related services via OAuth2 to the customers that acquire the offering.

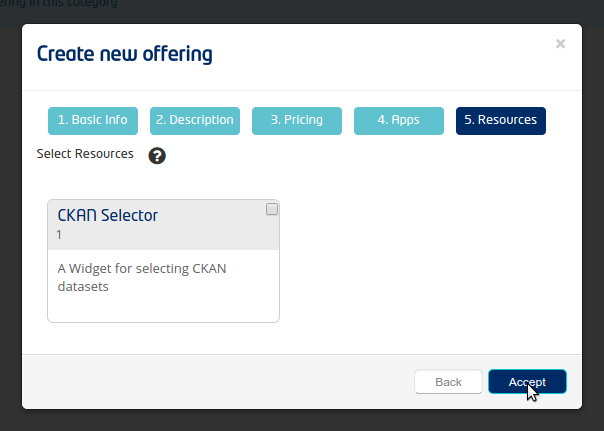
The final step consist of selecting resources previously registered by the provider.
Updating an offering
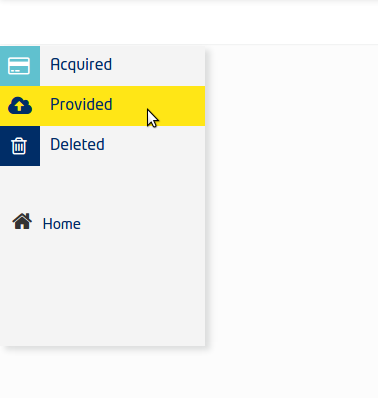
To update an offering, go to My Offerings view and the Provided section. This tab contains the offerings provided by the service provider.
Select the offering to be updated. Note that only offerings with uploaded state (Offerings that have not been published yet) can be updated.
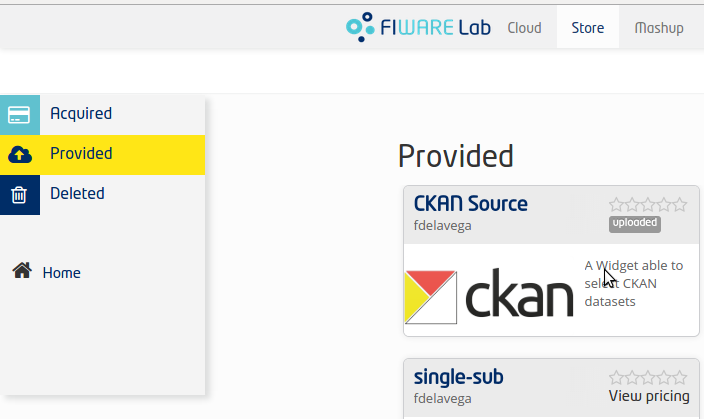
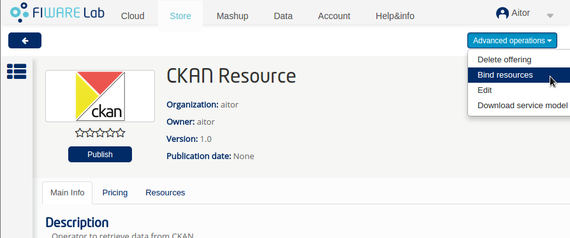
In the advanced operations, select Edit.
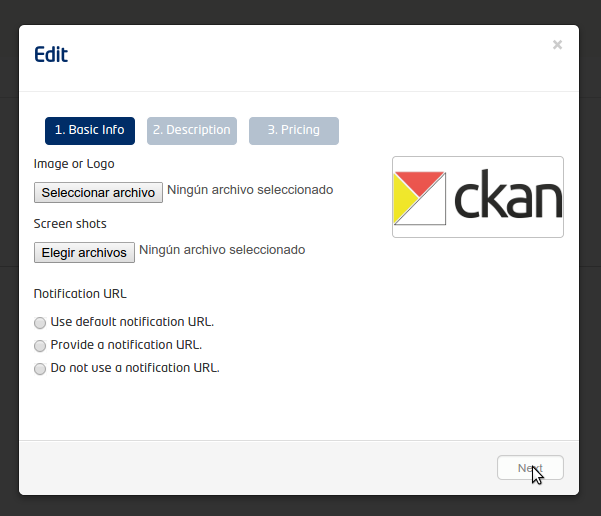
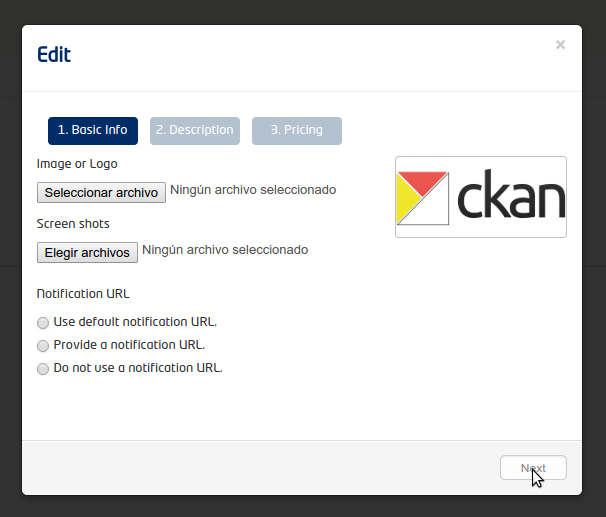
In the displayed modal, it possible to provide some screenshots or a new logo. Additionally, it allows to modify the notification URL of the offering.
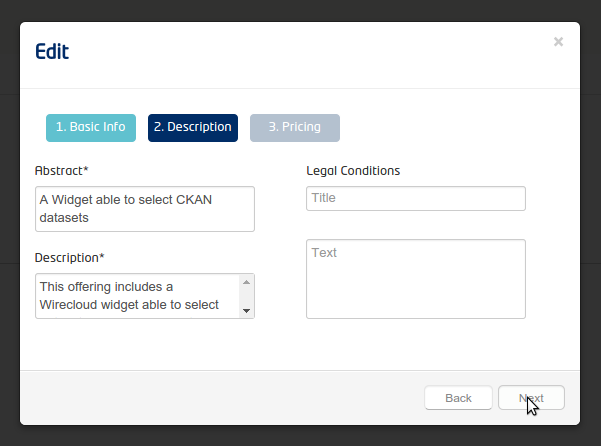
The next step, allows to modify the description information of the offering.
Finally, the last step allows to modify the pricing model of the offering.

Binding resources
Once an offering has been created it is still possible to manage the included resources. To bind resources, select the My Offerings view and the Provided section. Then select the offering to be bound. Note that only offerings with uploaded state can be updated.
Select the “Bind resources” option.
In the displayed modal, select the resources to be bound and press Accept
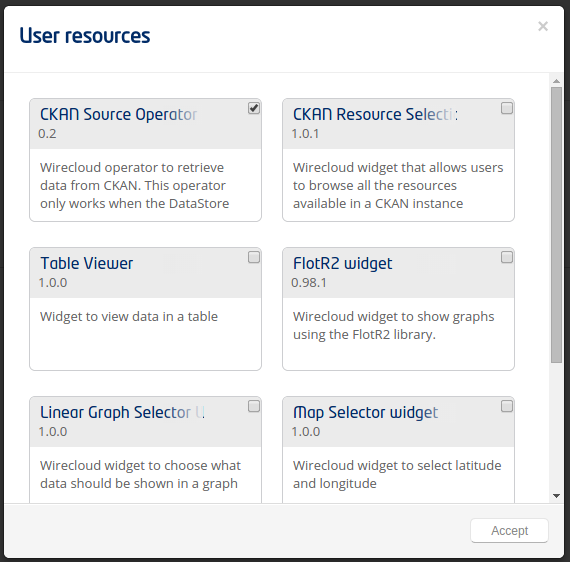
Note that this operation is an absolute update, that is, the selected resources are the bound resources. Therefore, it is possible to bind and unbind resources in the same action.
Publishing an offering
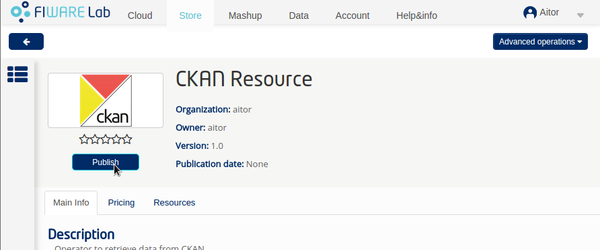
Publishing an offering means start selling it. To publish an offering select the My Offerings view and the Provided section. Then select the offering to be published.
In the offering details view select the Publish option.
In the displayed modal, select the Marketplaces where publish the offerings. Note that selecting a Marketplace is not mandatory.
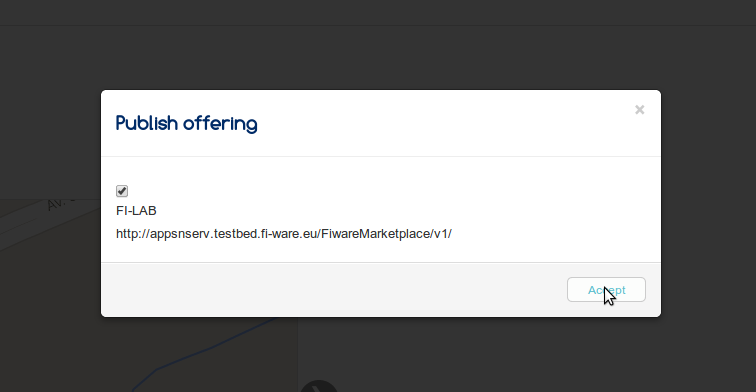
The offering is now Published and cannot be updated.
Tagging an offering
It is possible for an offering provider to tag their offerings. To tag an offering, select the My Offerings view and the Provided section. Then select the offering to be tagged.
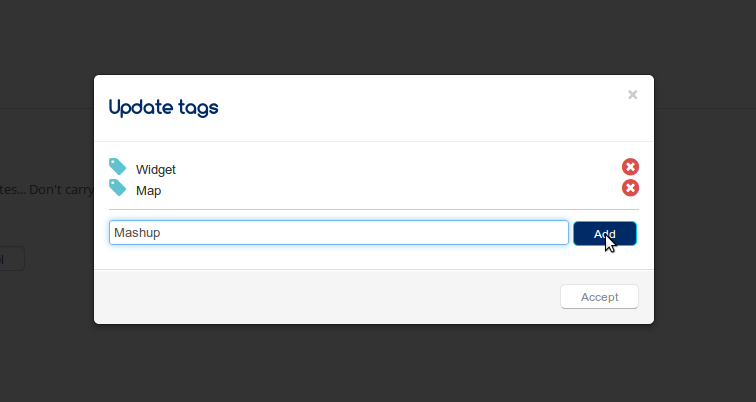
Select the Update tags option
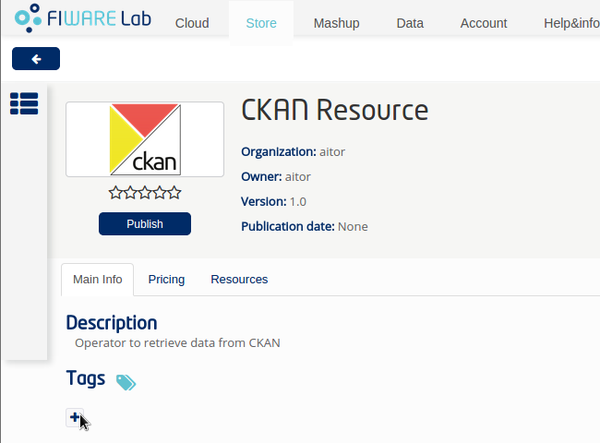
Include the different tags and press Accept
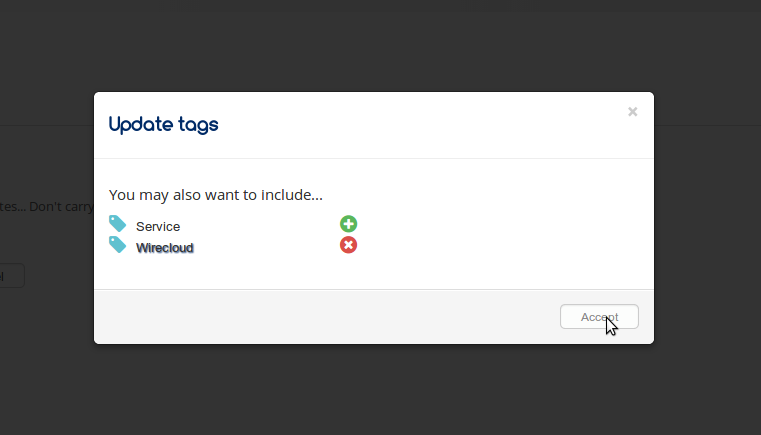
You may also be suggested some tags that may fit your offering.
Deleting an offering
The action of deleting an offering has different effects depending on its state. If the offering has not been published, it is completely deleted from WStore. However, If the offering has been published, its state changes to deleted and cannot be acquired anymore, but customers that has already acquired it still has access to the offering and its resources.
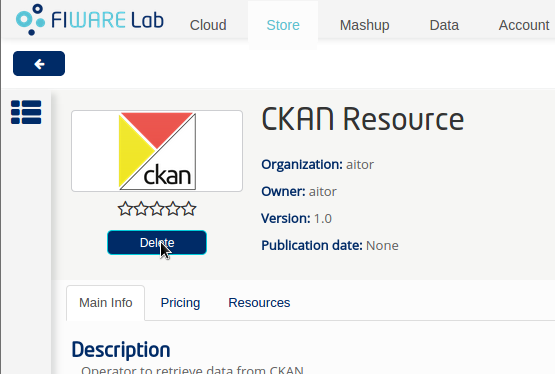
To delete an offering, select the My Offerings view and the Provided section. Then select the offering to be deleted.
In the offering details view, select the Delete offering option
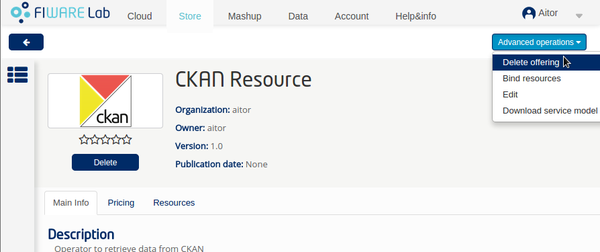
Select accept in the displayed window.
If the offering has been published the option Delete replaces Publish as main action.
Customer
This section explains how a customer can search and acquire offerings using WStore GUI.
Searching for offerings
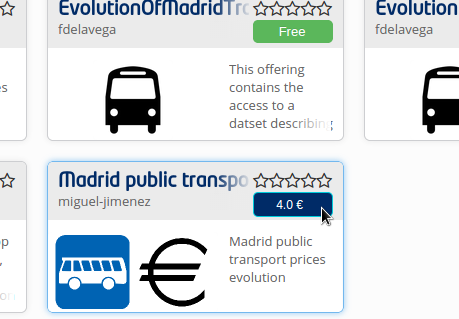
There are some options for searching offerings in WStore, As it can be seen in the following image, the main page contains the Top rated and the latest offerings.
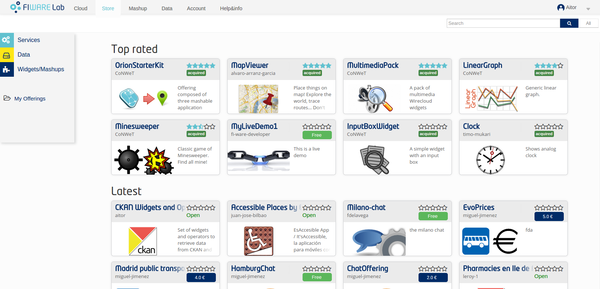
To search using a keyword type it in the textbox and press Search.

The offerings that match the search are shown.
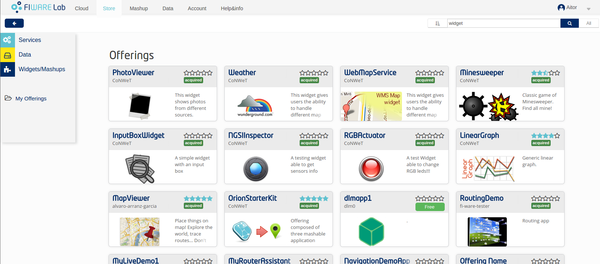
It is also possible to view all the offerings selecting the All button.
Acquiring an offering
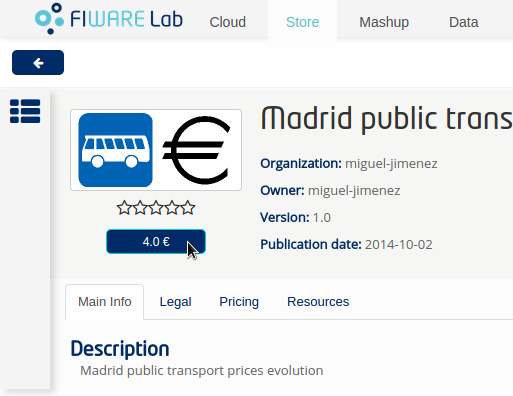
The first step to acquire a published offering is selecting it after searching. To start with the purchasing process click on the button included in the offering.
Arternatively, it is possible to select the Acquire button in the offering details view.
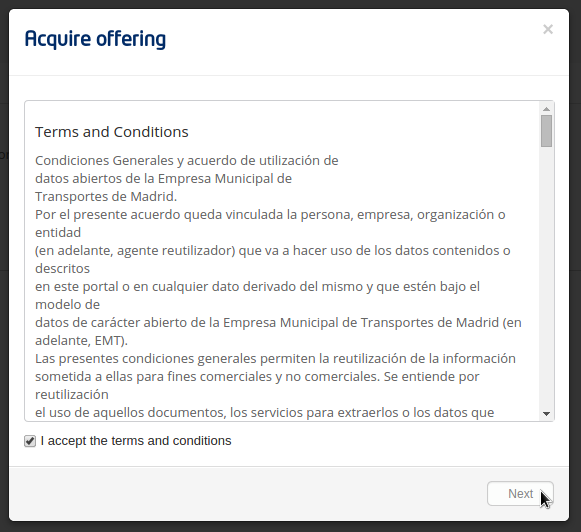
If the offering has some legal terms, you will be forced to accept them in order to be able to acquire it.
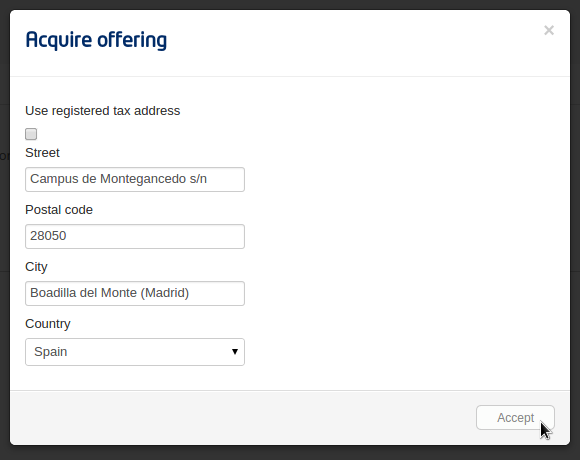
Once that you have accepted the terms, you will have to provide a tax address for the purchase. Is possible to use the default tax address from the user profile by clicking the checkbox Use user profile tax address. Then, select Accept.
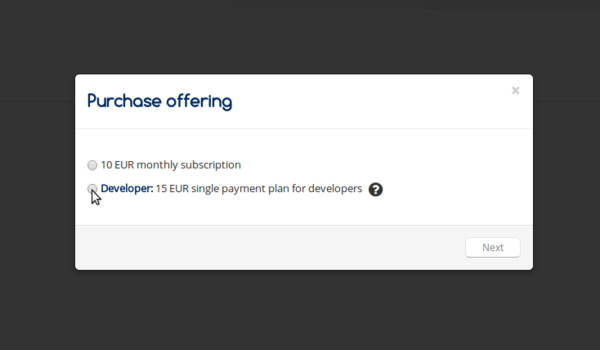
In case the offering can be acquired under different pricing models, the first step is selecting the plan.
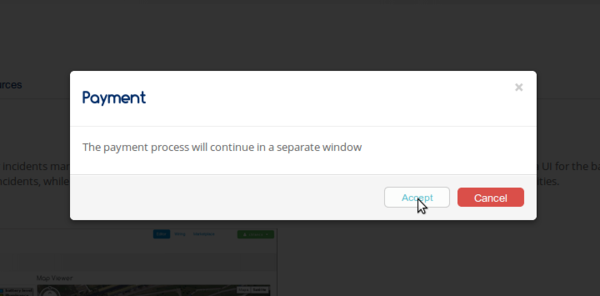
WStore informs that the payment process will continue in a separate window.
WStore redirects the browser to the PayPal confirmation page.
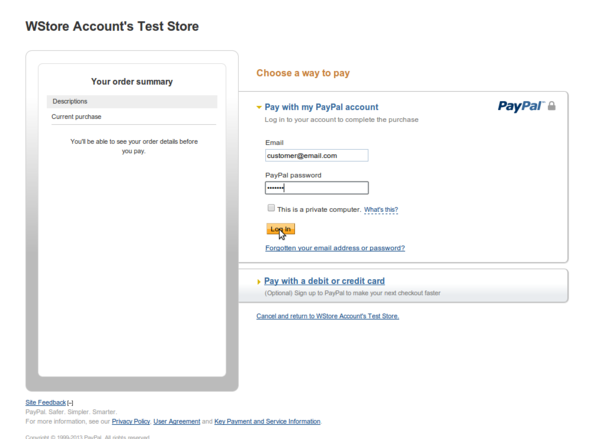
Introduce your PayPal credentials and confirm the payment.
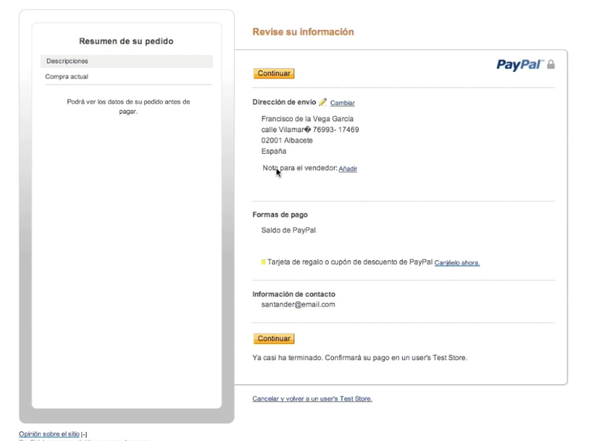
Return to WStore page and end the process by closing the displayed window.
Downloading resources and invoices
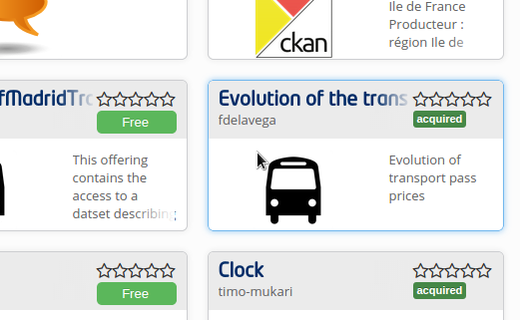
To download the resources and the invoices of a purchased offering, select the My Offerings view and the Acquired section . Then, select the offering.
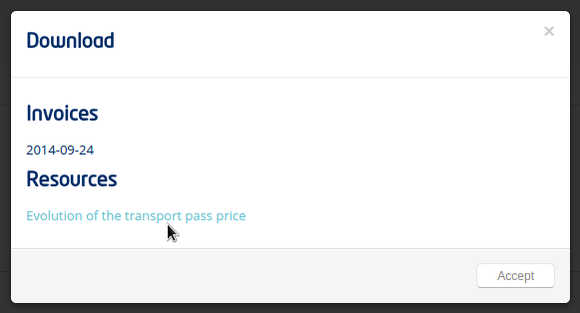
Select the Resources button.

In the displayed modal, is possible to download invoices and resources by clicking on the link.
Reviewing an offering
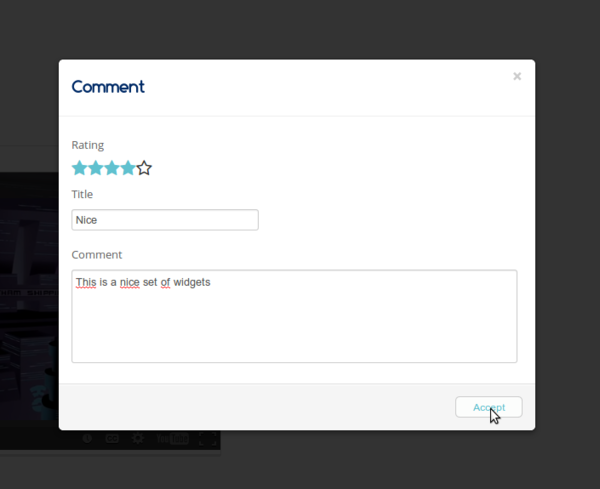
To review and rate an offering, select an acquired or an open offering and click on the Review button situated in the Reviews section.
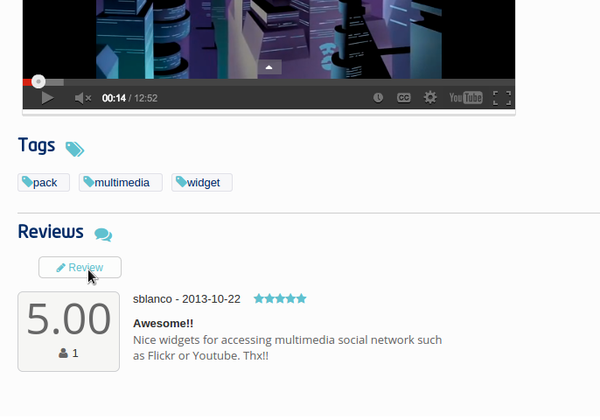
Fill the number of stars, give a title and a comment for your review.
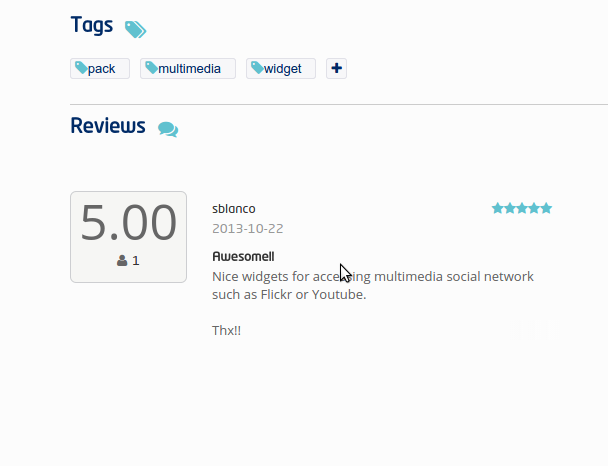
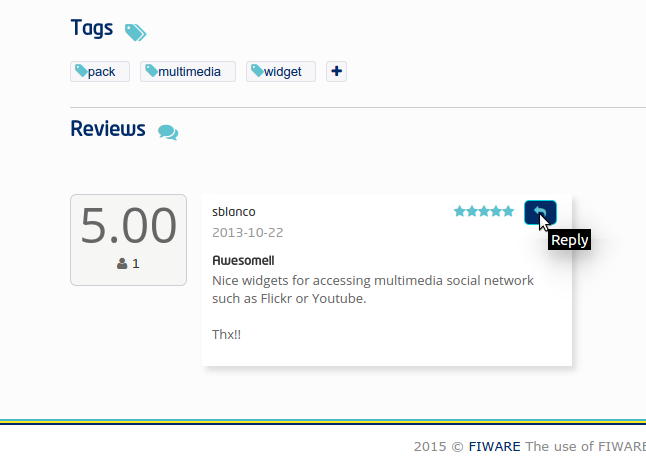
Additionally, the owner of the offering can reply to the existing reviews. To reply a review, the first step is clicking on the review to display its whole information.
Then, click on the reply button.
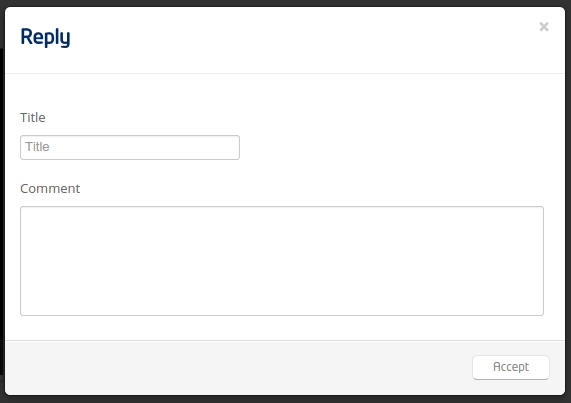
Finally, provide a title and a comment for your reply.
Admin
This section describes the different tasks that can be performed by an admin user using WStore GUI.
Registering WStore on a Marketplace
WStore can be registered on a Marketplace in order to allow service providers to publish their offerings on them, making their offerings available to potential customers that search for offerings in the Marketplace.
Note that this process is made from WStore GUI, since WStore needs to have information about in what Marketplaces is registered on.
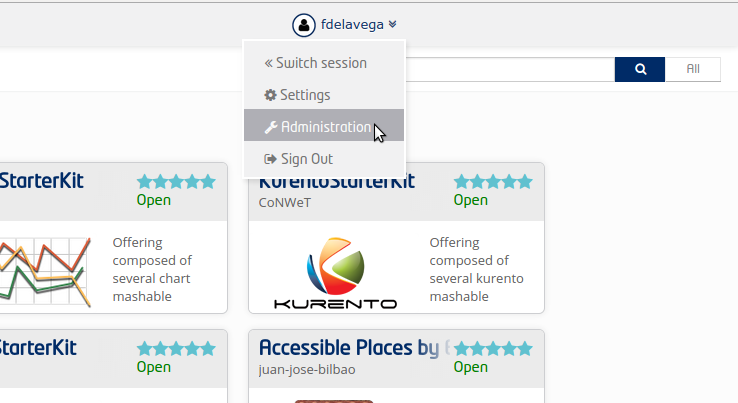
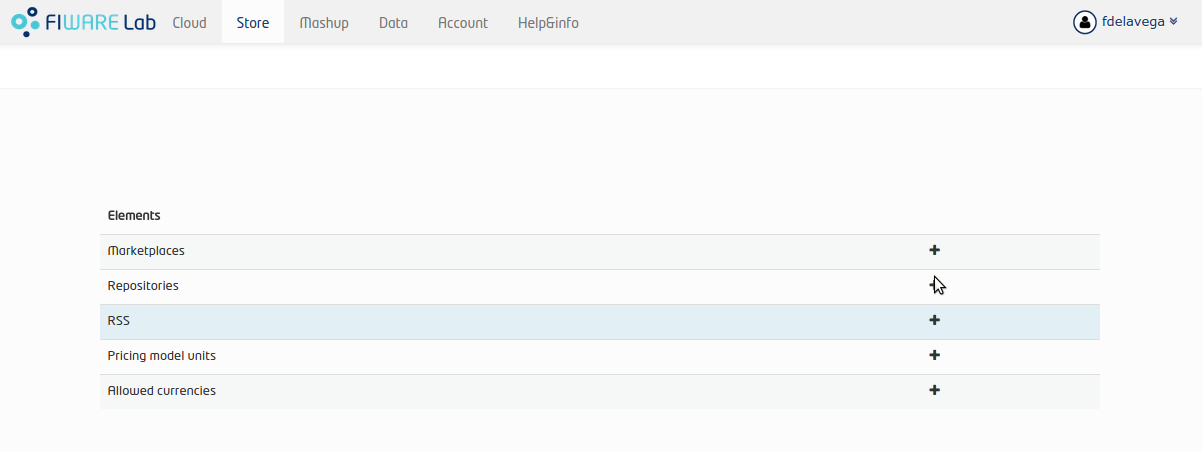
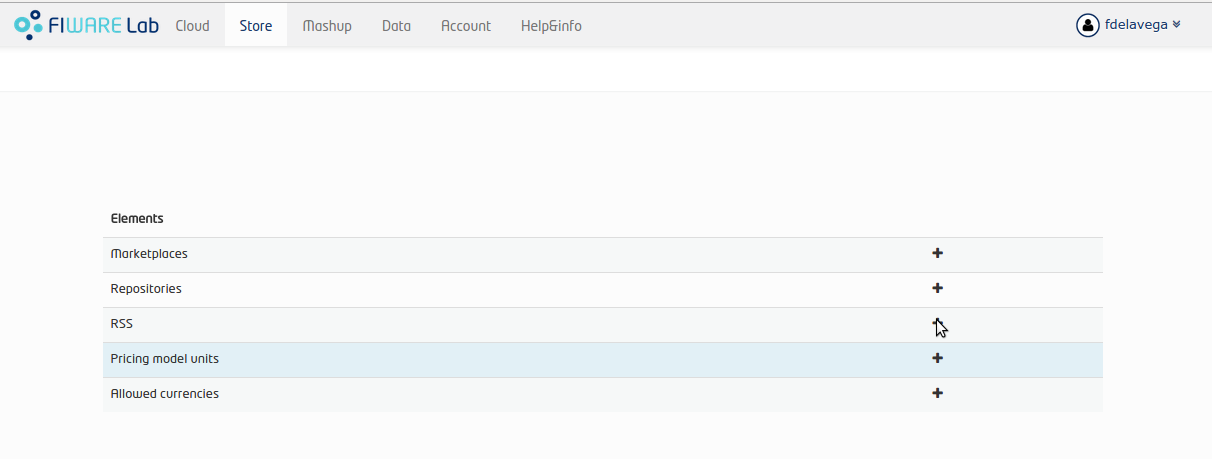
To register WStore on a Marketplace, select the Administration view.
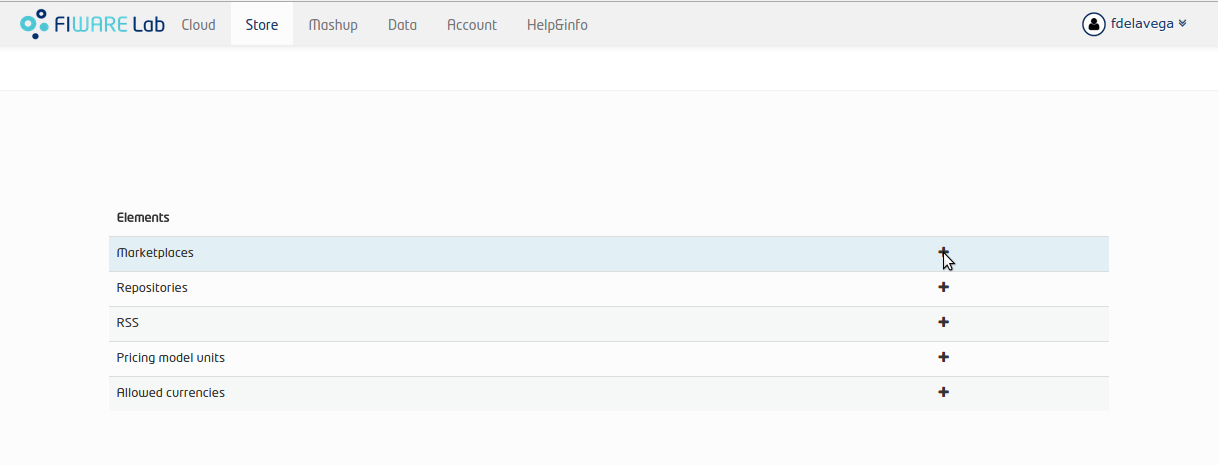
Press the Add symbol of the Marketplaces row.
Fill the internal name, the host and the API version (1 or 2) of the Marketplace.
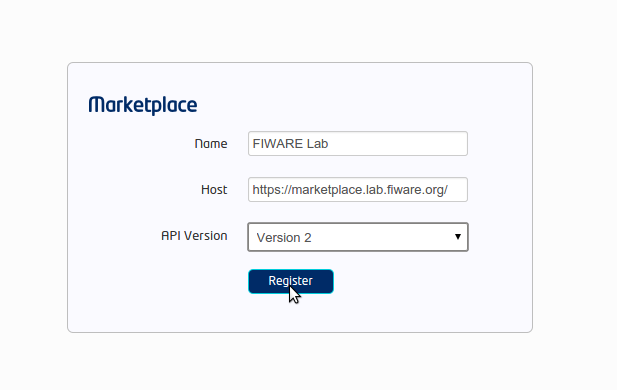
Note
Marketplace API version 1 is deprecated
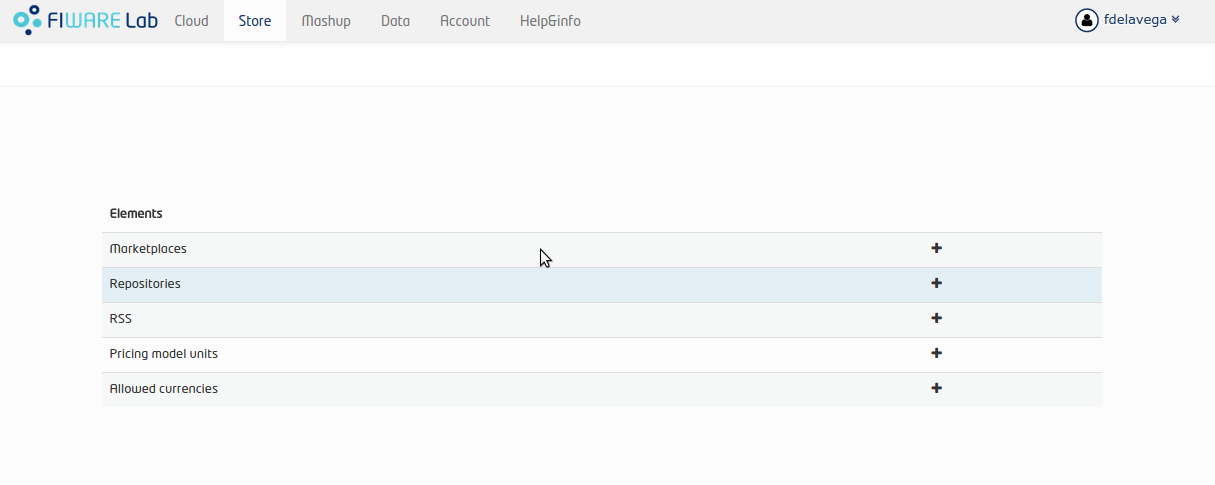
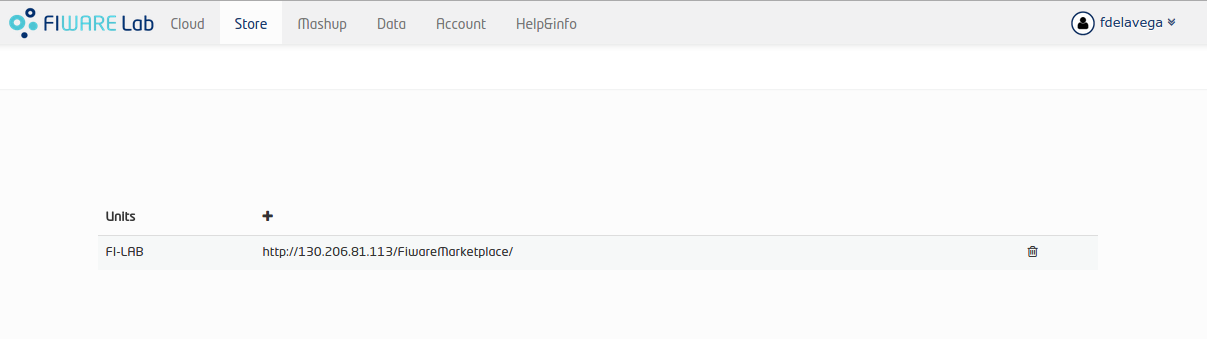
Pressing on the Marketplaces row is possible to view in what Marketplaces WStore is registered on.
Registering a Repository on WStore
It is possible to register some instances of the Repository GE in order to allow service providers to Upload USDL documents directly when creating an offering.
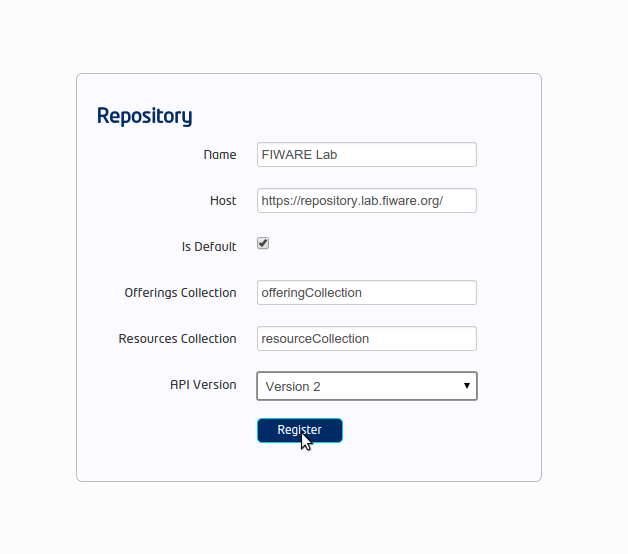
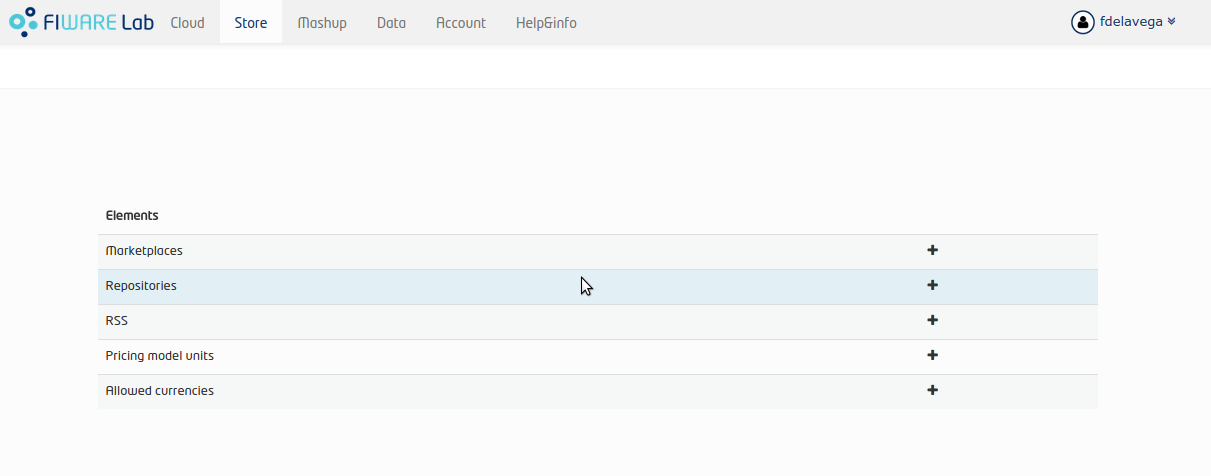
To register a Repository on WStore select the Administration view and press the Add symbol of the Repositories row.
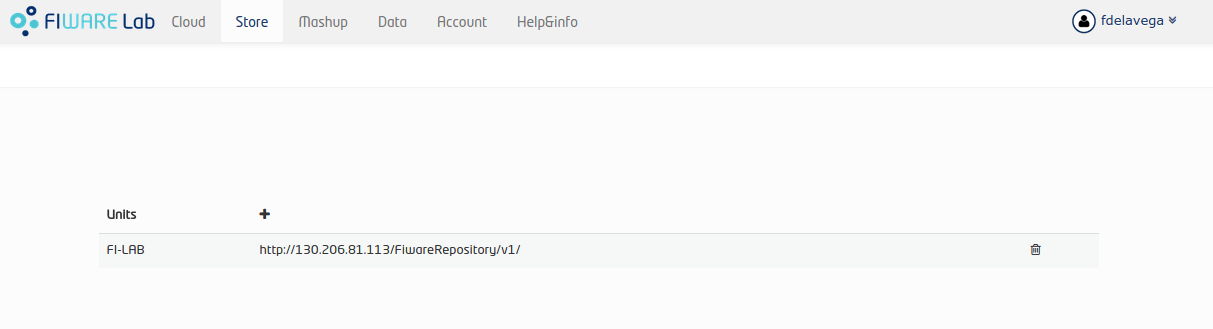
Fill the internal name and the host of the Repository. Addtionally, it is possible to specify that the current repository is the default one in WStore by selecting the flag is default. Moreover, it is necessary to provide the collections that will be used for storing offering and resource USDL description. Finally, it is required to choose the API version of the repository (1 or 2).
Note
Repository API version 1 is deprecated
Pressing on the Repositories row is possible to view what Repositories are registered on WStore.
Registering a RSS on WStore
It is possible to register RSS instances on WStore in order to perform the revenue sharing of the purchased offerings.
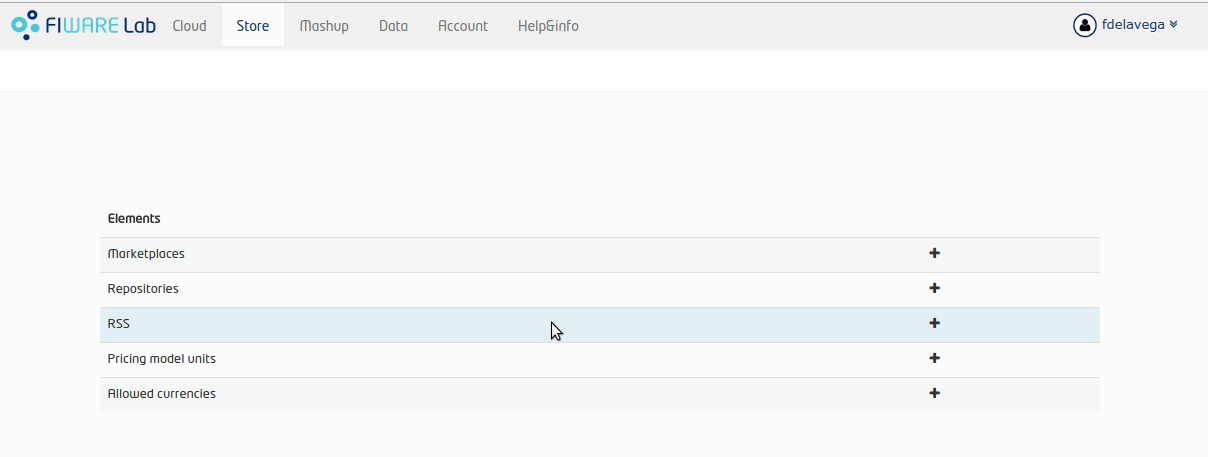
To register a RSS on WStore select the Administration view and press the Add symbol of the RSS row.
Fill the internal name, the host and the API version (1 or 2) of the RSS. Then provide the basic revenue models for WStore. This fields are used to specify the percentage of the revenues generated in WStore that belongs to WStore owners as platform providers. It allows to specify a different percentage for offerings containing single payments, subscriptions and pay-per-use respectively. Finally, it is also possible to provide the default expenditure limits for WStore.

Note
RSS API version 1 is deprecated
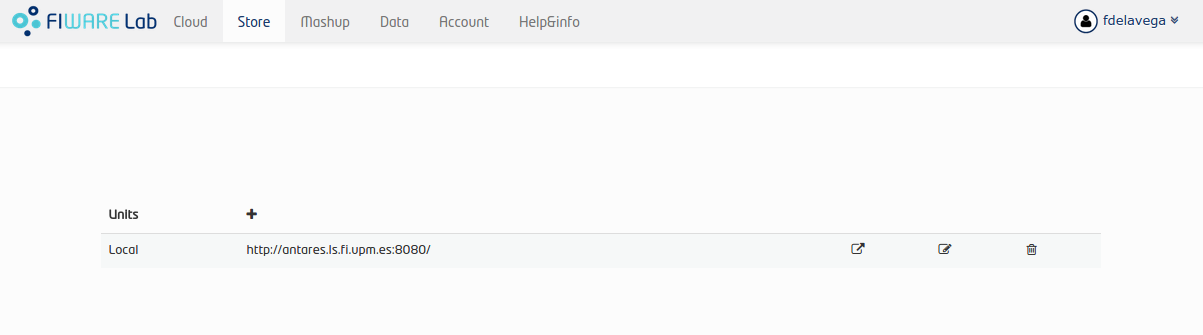
Pressing on the RSS row is possible to view what RSSs are registered on WStore.
Registering a Price Unit
Price Units are used in order to determine the concrete pricing model that applies to an offering.
To include a new supported price unit select the Administration view and click the add symbol in the Pricing model units row.
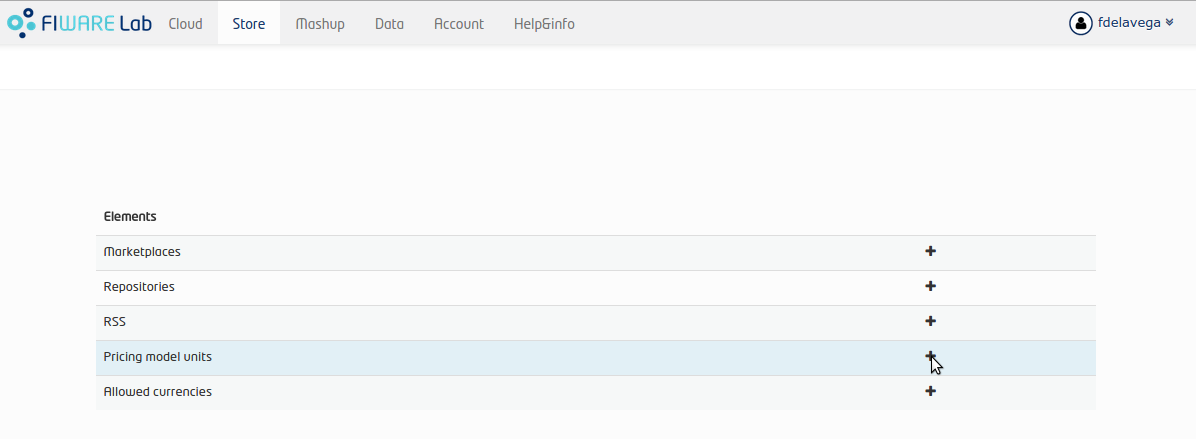
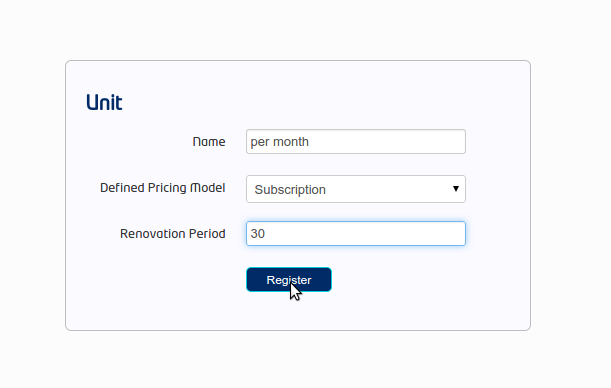
Fill the name and the defined model of the unit. If the defined model is Subscription it is also necessary to specify the renovation period.
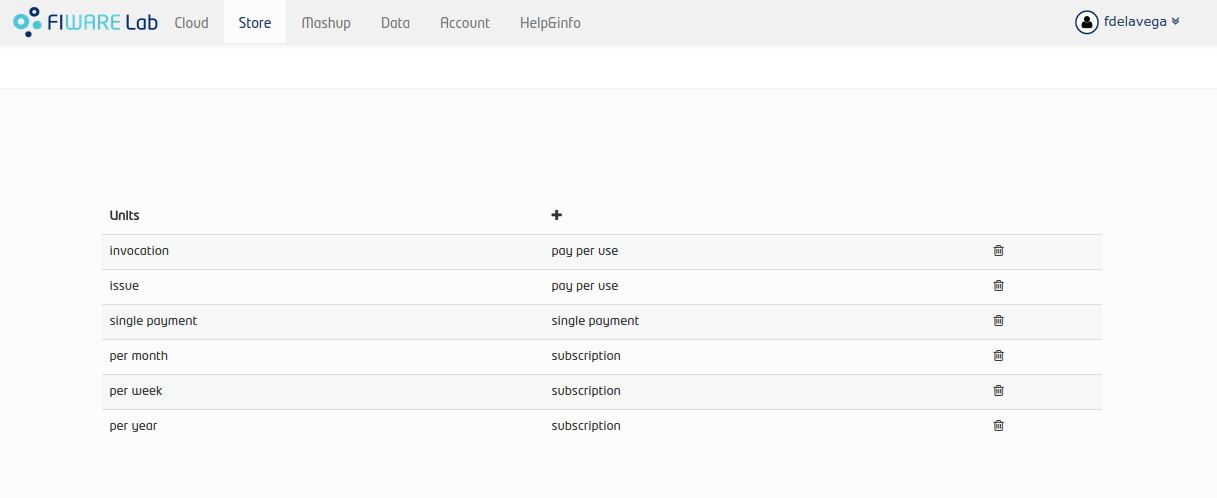
It is possible to view existing units by click on the Pricing model units row.
Registering a Currency
Currencies are used in order to determine what currencies can be used in the pricing model of an offering.
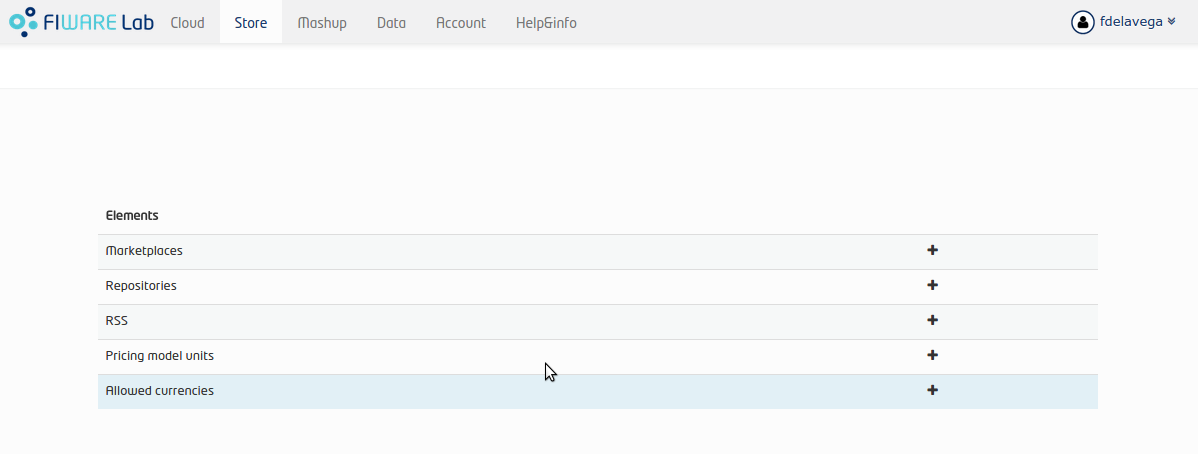
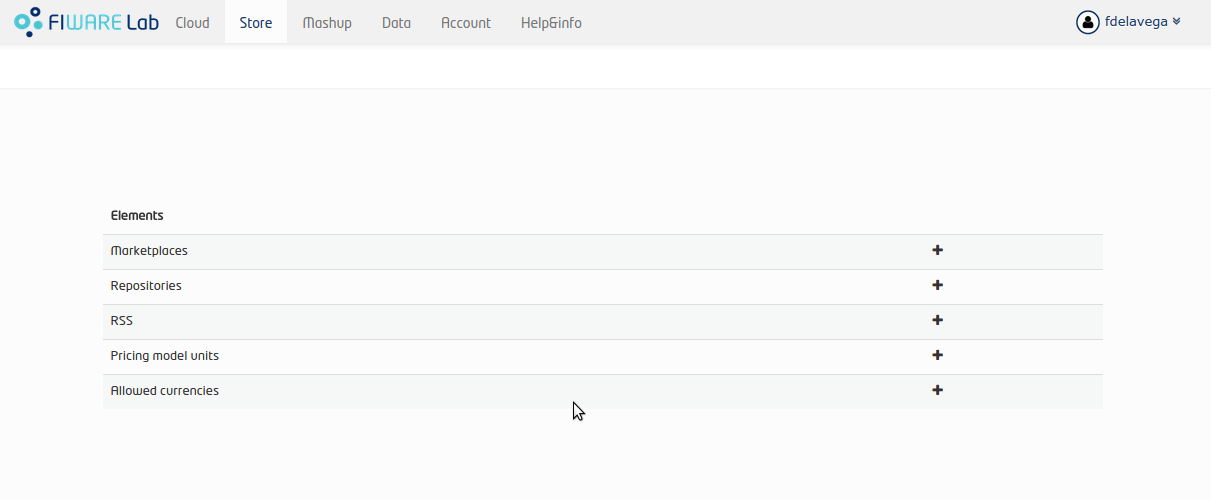
To include a new supported currency select the Administration view and click the add symbol in the Allowed currencies units row.
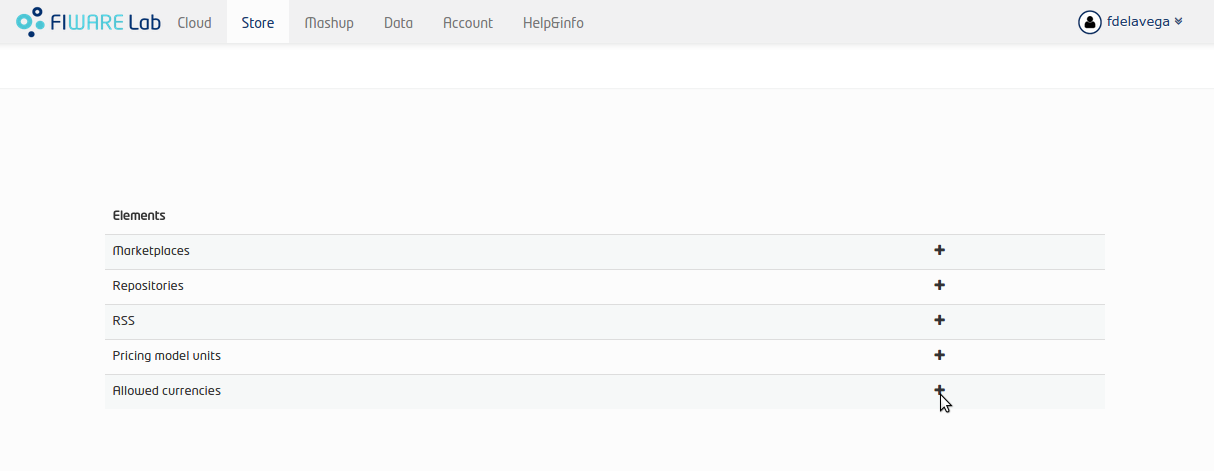
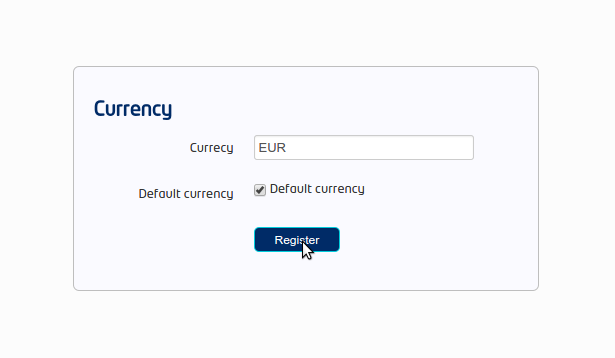
Fill the name and choose whether the currency is the default one or not.
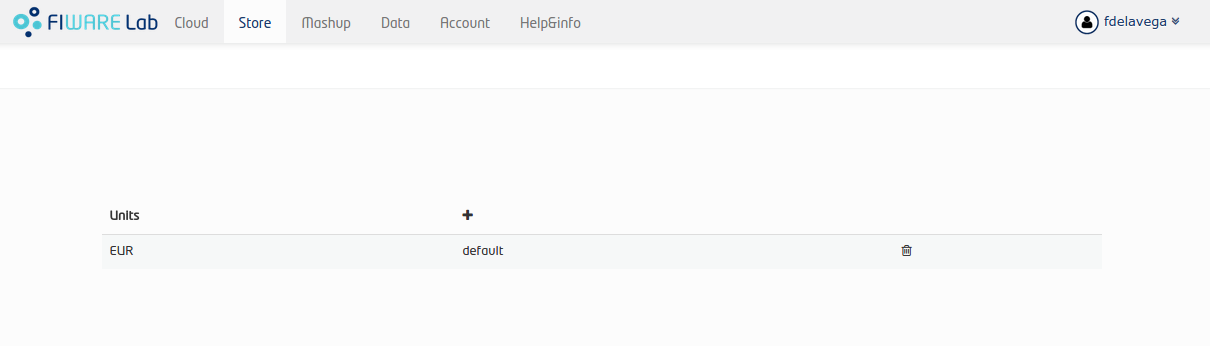
It is possible to view existing currencies by click on the Allowed currencies row.
Programmer Guide
WStore allows to offer any kind of digital asset. In this regard, some kind of digital assets may require to perform specific actions and validations that require to know the format of the asset. To deal with this problem WStore allows to register types of resources by creating plugins. This section explains how these plugins are created.
Additionally, WStore exposes an API that can be used by developers in order to integrate the monetization features offered with their own solutions. The complete description of this API can be found in:
Plugin Package
WStore plugins must be packaged in a zip. This file will contain all the sources of the plugin and a configuration file called package.json in the root of the zip. This configuration file allows to specify some aspects of the behaviuor of the plugin and contains the following fields:
- name: Name given to the resource type. This is the field that will be shown to providers
- author: Author of the plugin.
- formats: List that specify the different allowed formats for providing a resource of the given type. This list can contain the values “URL” and “FILE”.
- module: This field is used to specify the main class of the Plugin.
- version: Current version of the plugin.
- overrides: List that specify a set of fields of the resource that will be overriden by the plugin code when creating a resource of the given type. This list can contain the values “NAME”, “VERSION” and “OPEN”.
- media_types: List of allowed media types that can be selected when creating a resource of the given type
- form: Optional field that can be used to define a form that is displayed to providers in order to retrieve meta information that is required by this specific resource type.
Following you can find an example of a package.json file:
{
    "name": "Test Resource",
    "author": "fdelavega",
    "formats": ["FILE"],
    "module": "plugin.TestPlugin",
    "version": "1.0",
    "overrides": ["NAME", "VERSION"],
    "form": {}
}
The form field allows to specify a concrete form that is rendered and diaplyed to providers when registering a resource of the given type in order to retrieve metadata. In this regard, this field allows to specify text inputs, selects, checkboxes and textareas. The following example shows a configuration file where this form has been filled:
{
    "defined_type": "CKAN Dataset",
    "author": "fdelavega",
    "version": "1.0",
    "module": "ckan_dataset.CKANDataset",
    "media_types": [],
    "formats": ["FILE", "URL"],
    "overrides": [],
    "form": {
        "notif": {
            "type": "text",
            "placeholder": "Notification URL",
            "default": "http://data.lab.fiware.org/notify_creation",
            "label": "Notification URL",
            "mandatory": true
        },
        "license" : {
            "type": "select",
            "label": "Dataset license",
            "options": [{
                "text": "Creative Commons",
                "value": "opt1"
            }, {
                "text": "BSD",
                "value": "opt2"
            }]
        },
        "is_private": {
            "type": "checkbox",
            "label": "Is private",
            "text": "Check if the provided dataset is private or not",
            "default": true
        },
        "add_data": {
            "type": "textarea",
            "label": "Additional data",
            "placeholder": "Additional data"
        }
    }
}
The source code of the plugin must be written in Python and must contain a main class that must be a child class of the Plugin class defined in WStore. Following you can find an example of a plugin main class.
from wstore.offerings.resource_plugins.plugin import Plugin

class TestPlugin(Plugin):
    def on_pre_create_validation(self, provider, data, file_=None):
        return data

    def on_post_create_validation(self, provider, data, file_=None):
        pass

    def on_pre_create(self, provider, data):
        pass

    def on_post_create(self, resource):
        pass

    def on_pre_update(self, resource):
        pass

    def on_post_update(self, resource):
        pass

    def on_pre_upgrade_validation(self, resource, data, file_=None):
        return data

    def on_post_upgrade_validation(self, resource, data, file_=None):
        pass

    def on_pre_upgrade(self, resource):
        pass

    def on_post_upgrade(self, resource):
        pass

    def on_pre_delete(self, resource):
        pass

    def on_post_delete(self, resource):
        pass
Implementing Event Handlers
It can be seen in the previous section that the main class of a plugin can implement some methods that are inherited from WStore Plugin class. This methods can be used to implement handlers of the different events of the life cycle of a resource. Concretely, WStore defines the following events:
- on pre create validation: This event is raised before WStore validates the information of the resource given by the provider. The main objective of this event is allowing the concrete plug-in to override some information of the resource, which is then validated by WStore. The handler of this event receives the provider, and the raw information given by the provider for the creation of the resource, that may include a file for “FILE” formats. Additionally, the handler of this event must return the processed data of the resource.
- on post create validation: This event is raised after the information given by the provider for creating the resource has been validated by WStore. The main objective of this event is allowing plug-ins to override resource information that is not intended to be validated by the Store. The event handler of this event receives the provider and validated information given by the provider.
- on pre create: This event is raised before a new resource is saved to the database. This event can be used to modify the resource object before saving it or for executing some tasks required by the concrete type of resource, such as generating some meta data to be saved with resource or performing specific validations. The handler of this event is called passing the provider and the validated data of the resource as parameters.
- on post create: This event is raised after a new resource has been saved to the database. The intention of this event is allowing the plug-in to perform some tasks that depend on the complete creation of the resource, for example notifying a server that a resource has been created in case it might be necessary. The handler of this event receives the saved resource object.
- on pre update: This event is raised before WStore saves the result of updating the basic info of a resource. This event is intended to allow plug-ins to perform specific validations of the data or override some fields. The handler of this event receives the modified resource object before saving it.
- on post update: This event is raised after WStore has saved the result of updating the basic info of a resource. The main objective of this event is allowing plug-ins to execute specific tasks that require the updated resource to have been saved in the database (e.g sending notifications). The handler of this event receives the modified resource object already saved in the database.
- on pre upgrade validation: This event is raised before WStore validates the information of a new version of a resource given by the provider. The main objective of this event is allowing the concrete plug-in to override some information of the new version of the resource, which is then validated by WStore. The handler of this event receives the raw information given by the provider for upgrading of the resource and the resource object.
- on post upgrade validation: This event is raised after the information given by the provider for upgrading the resource has been validated by WStore. The main objective of this event is allowing plug-ins to override some information of the new version of the resource that is not intended to be validated by WStore. The event handler of this event receives the validated information given by the provider and the resource object.
- on pre upgrade: This event is raised before a new version of a resource is saved to the database. This event can be used to modify the resource object before saving it or for executing some tasks required by the concrete type of resource, such as generating some meta data to be saved with resource or performing specific validations. The handler of this event is called passing the resource object as a parameter.
- on post upgrade: This event is raised after a new version of a resource has been saved to the database. The intention of this event is allowing the plug-in to perform some tasks that depend on the upgrade of the resource, for example notifying a server that a resource has been upgraded. The handler of this event receives the saved resource object.
- on pre delete: This event is raised before WStore deletes a resource. This event is intended to allow plug-ins to perform specific tasks and validations before a resource is removed. In this regard, a concrete resource type might require some actions to have been tackled by the provider of the resource before allowing a deletion. The handler of this event receives the resource object to be deleted.
- on post delete: This event is raised after WStore has deleted a resource. The main objective of this event is allowing plug-ins to execute specific tasks that require the resource to have been deleted from the database (e.g sending notifications). The handler of this event receives a copy of the deleted resource.
Managing Plugins
Once the plugin has been packaged in a zip file, WStore offers some management command that can be used to manage the plugins.
When a new plugin is registered WStore automatically generates an id for the plugin that is used for managing it. To register a new plugin the following command is used:
python manage.py loadplugin TestPlugin.zip
It is also possible to list the existing plugins in order to retrieve the generated ids:
python manage.py listplugins
To remove a plugin it is needed to provide the plugin id. This can be done using the following command:
python manage.py removeplugin test-plugin